Once you’re logged into Salesforce, you’ll be directed to Home.
Home
Home is the first place you’ll land when you log into Salesforce.
From Home, you can
Monitor your performance and goal
Get insights on key accounts
Can access the Assistant,
A list of things to do and places to be.
Get insights News
Focus your selling activities on your Top Deals
Your Salesforce admin can create custom Home pages that appear for different profiles, so you may see different features on your Home page.
Performance Chart: Monitor and update your performance to goal.
Assistant: Stay on track by seeing the leads and opportunities that require your attention.
News: Get insights at a glance on your important accounts.
Upcoming events: See the next five meetings on your calendar today.
Today’s tasks: See up to five tasks due today.
Recent records: Access links to recently viewed records.
Top deals: View your top open opportunities in a convenient list.
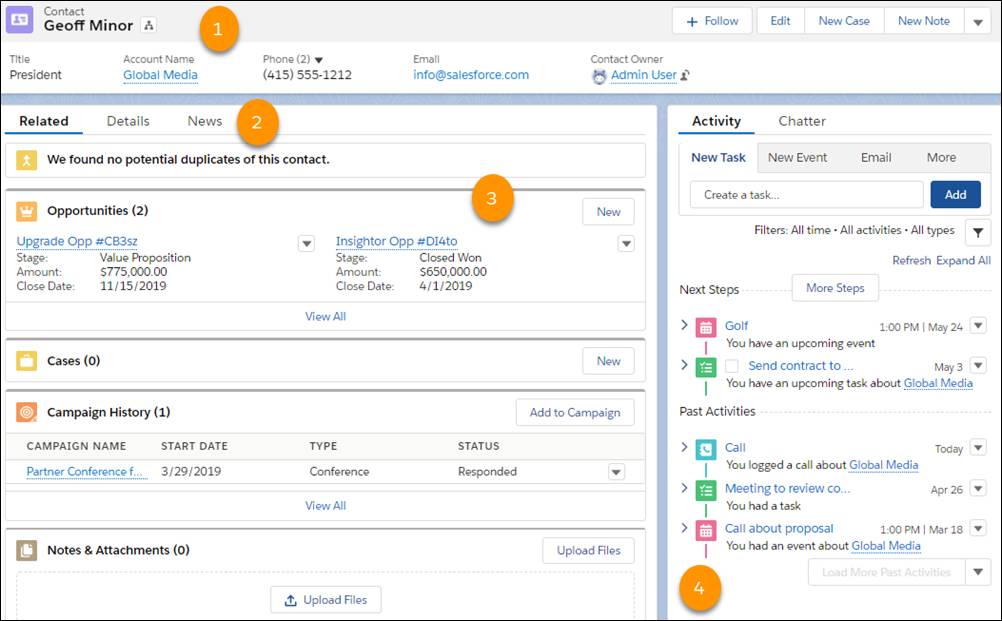
Accounts and Contacts
An account is a company you’re doing business with, and contact is someone who works at that account.
You can create accounts and contacts from these tabs.
Opportunities
Opportunities are deals in progress. In Salesforce, you can create opportunities for existing accounts or by converting a qualified lead.
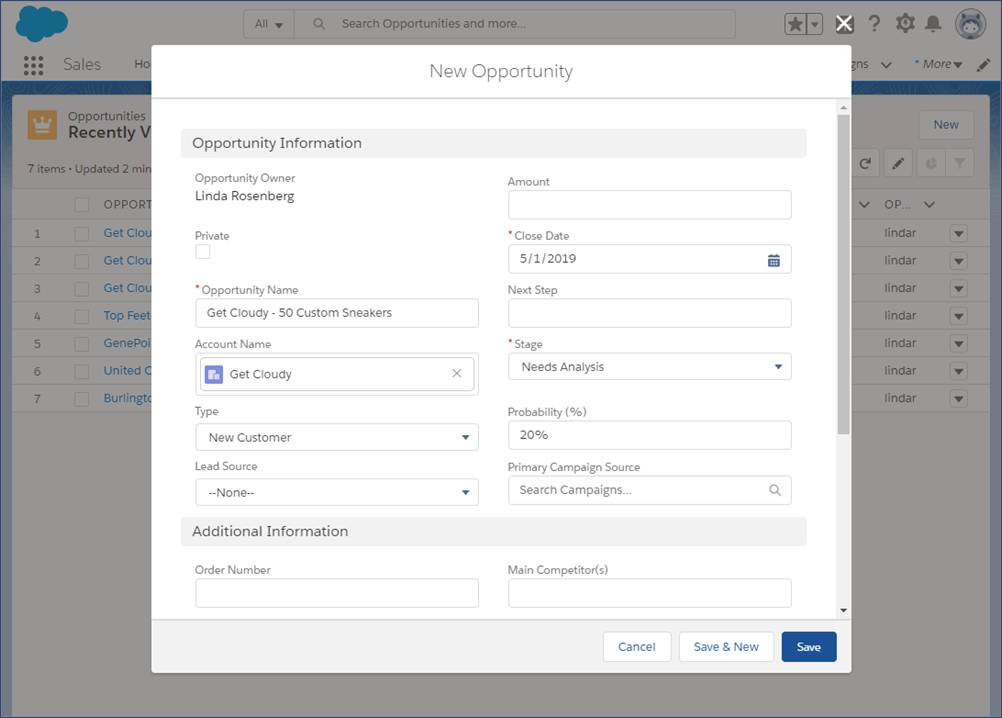
Let’s start by creating an opportunity record where we can track our progress.
On the Opportunities tab, click New.
If your org has more than one record type for opportunities, select the type that best represents this opportunity.
Give the opportunity a name: Get Cloudy - 50 Custom Sneakers.
Select the account that the opportunity is related to.
Choose a close date for the opportunity.
Select the opportunity’s current stage. For now, let’s use Needs Analysis. Salesforce adds a probability based on the stage selected. If the probability isn’t accurate, you can change it.
Click Save.
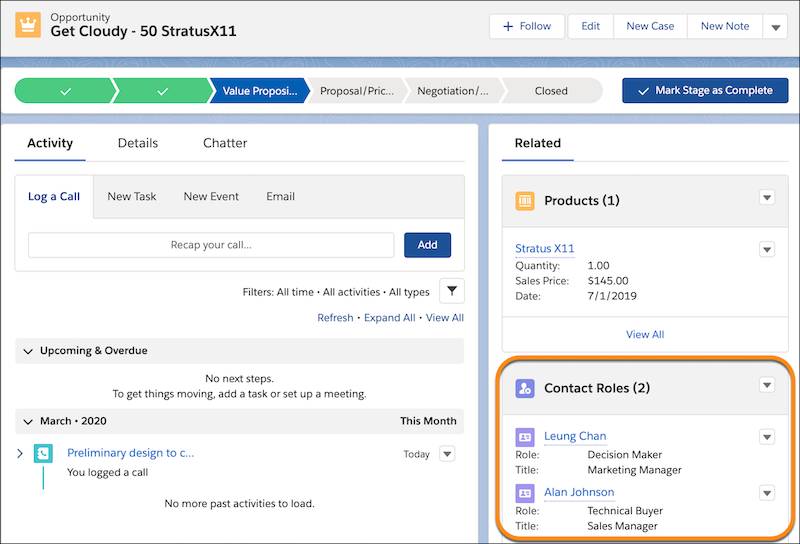
Contact Roles on Opportunities
Contact roles on opportunities tell you which contacts you’re dealing with and how each contact is related to the opportunity. You can also use contact roles to link contacts from other accounts to the opportunity.
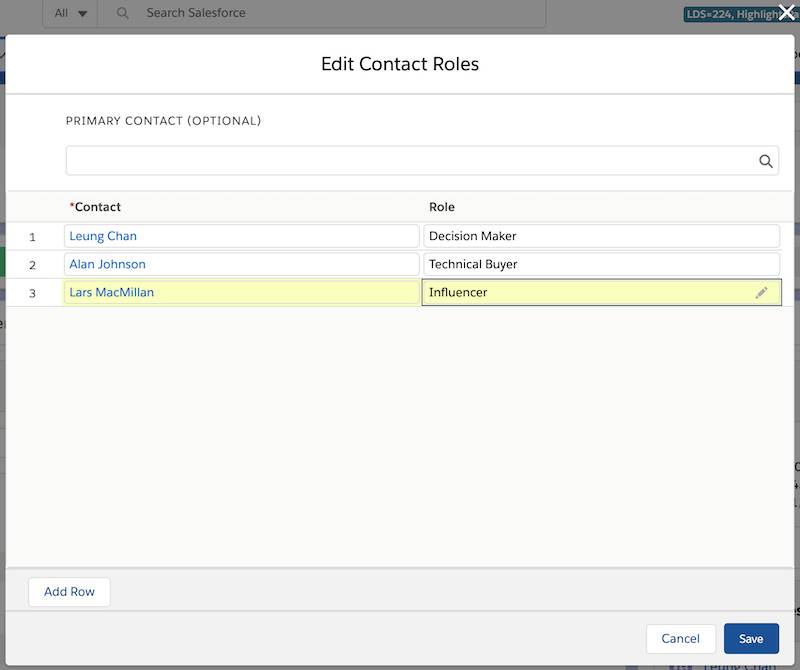
Take a minute to add Lars as a contact for the Get Cloudy Canada account. Then continue on to add his contact role for the opportunity you created.
In the Contact Roles related list of an opportunity, select Edit Contact Roles.
Enter a contact.
Choose a role. If you don’t select a role or the role is set to None, changes you make to this role aren’t saved.
If you like, select a primary contact for this opportunity.
Click Save.
Now you can use Salesforce to store accounts, Contact, and Opportunity.
Next, you can check out How to create custom fields on objects. So that you can store more information.